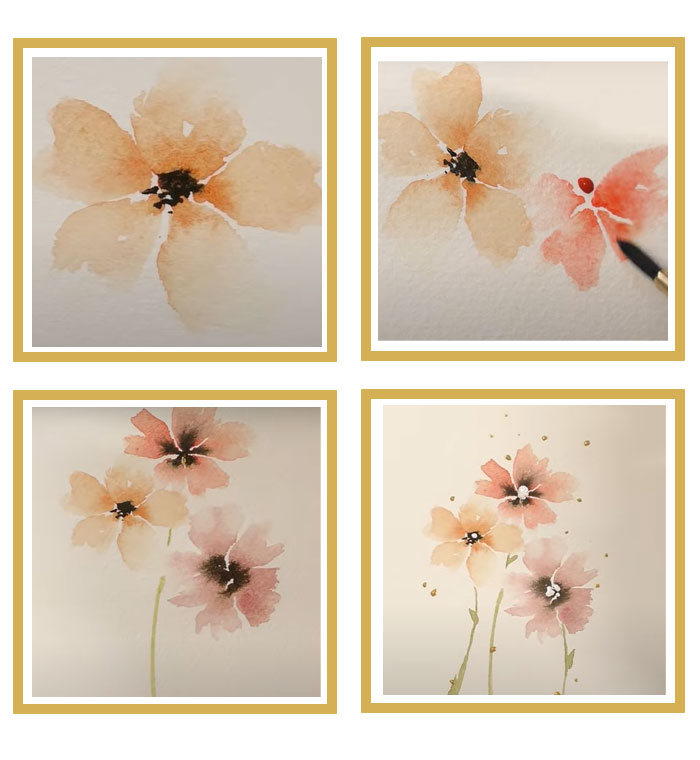
If you are fond of adventure, the patchy are the better choice. You can do it by using contrasting colors to slight clap. How fast and easy for beginner flower painting to create compact flowers. Everything is taking a repeated sliding through a common water color brush. Obviously, the size of flowers depend on the size of the brush. Now I am going to mix the yellow and red, and then start to paint my first white flower wall art. So I want to put them on here. Three points are painted very close to each other. I am gonna wipe out needless acrylic on the brush, immerse dirty water and then immerse clean water. I really hope my brush is soaking wet but fairly wet. To expand the color with the top of the brush. I just slightly paint it and repeat this process. Sometimes I swing the brush, it will bring some kind of interesting effect to me. I am going to twist the canvas, because I feel it is closer to me. Now you know me how to enlarge the brush on the on canvas with easy flower painting on canvas. A very clean brush to delete the rough edge. That means I have wiped it into the papers. Now starting at the white color, as you see, it also becomes soft, but when I lose the flower paintings on canvas, I am not aiming for perfectly blended and tapered edges. That I hope it is a bit of not integrity. If the colors enter outer petals again, immerse them into dirty water. Clean wet slightly wipe on paper. I just need to wiggle my brush. So I can create other petals. This is a flower. I am fond of that a bit of correct and dark. But what I need to do is touch the white easy flower canvas painting ideas part in the middle and if it will catch onto each petal. If the petal is wet enough, the blown will walk into each of the petals. But at this moment resist the temptation to touch it. I think I should add a little opera pink into the mixture. Only just make it bold. So I am gonna do it again and again around the flower wall art. Now I have the bottom of the flower without drying it. It does not matter. I do not hope the color really mix in this point. I would not move that away a little bit. I click the outwards color with my brush. And then I am gonna to grasp more stuff and try something more when I add a bit and not touch other petals. It is very pleasant to see a line between flower petals. But that might be a kind of style, so if you like flower petals all in touch. No matter how eager your heart is to do what your style calls you to do, you see how very patchy. I have a petals darker than others. Everything is nice. I do not want to adjust to the tail end of the flower. I think it looks very great. I am going to grasp a little bit of brown and paint in the middle of floral paintings on canvas. There is more water and a bit of paint. I just take a little bit more acrylic. Now it is very obvious. I think it will be great. I am gonna paint the third flower on the bottom with a bit of pink and water. As I think, the two flowers look obviously awesome, so let me put that on a little bit more towards the bottom. So again, three dots wiggle more wiggling. Once you have mastered it, you can mass-produce these fairly. Actually, I don’t have many kinds of colors to paint acrylic. So I might have to reload it. Sometimes it will be an accident, especially when you are in a hurry, but you just only need to flow. So I am gonna push that out a little bit. It is a little bit the form. Everything is good. Let it dry in the meantime, what I can do is paint stem from the middle of stem at start. I want to confirm that the stem is too thick. I am often fond of the stem with thin, but we will do that. And I hope it curves this way. I want to make the bottom fat. My feeling keeps again. It is very easy for kids. If you have these small wiggle stuff, To create a very tiny leaf with a slight clap. and again the brush i am holding almost perpendicular to the paper and then there is a tiny leaf in here, there is another leaf. How to complete through fast and easy. At this point, you might reinforce stems. If you feel they need to strengthen, it looks like it keeps dark in the middle. What I am going to do possible is add a bit of white acrylic paint. Or in the circumstances, I have white ink. I will give it a little bit of drying with a heat gun. Mixing it into ink. Clap sightly on the center, it might benefit from having multiple dots, only for making a little more round.
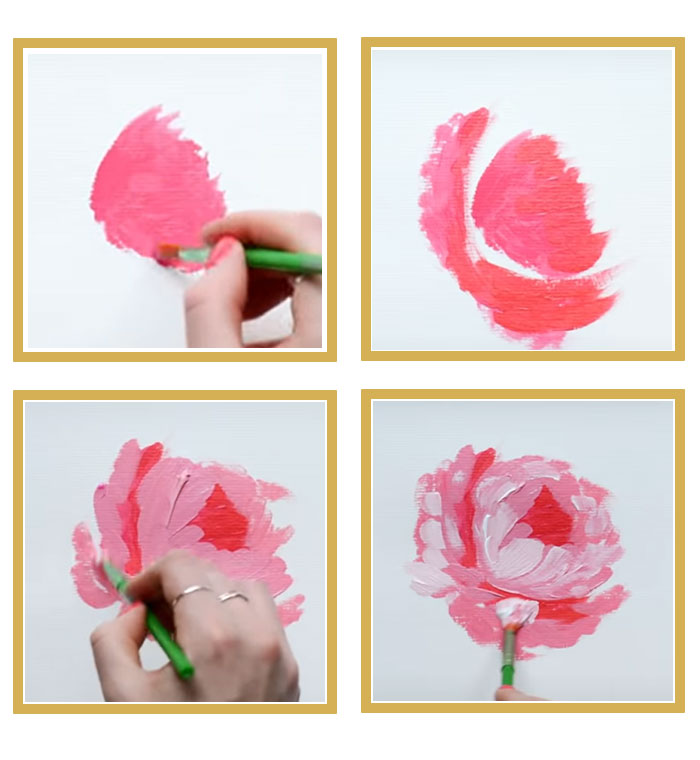
Here will show you how to paint blue flower wall art with easy steps. Ready for easy flower acrylic paint tutorial a bottle of water, paint brushes, a piece of canvas, a palette, and a dirty towel. I usually use pink and red mixture color. I will create the basic shape of a flower canvas wall art, you can take your brushes, creating flick on the edge of flower petals. So using the original mixture and then adding a bit of white paint color to build a lighter tone. Here, you can use the paint quite thick acrylic to create more texture. Adding more white acrylic, we can get a lighter shade, taking it to add some outer petals and I am gonna take a tiny brush to create the last step layers. I am going to make white acrylic paint on the palette as the edge of petals adds a little bit of highlights. Always make sure you wash your brush out fully between each layer. You can use these stages with other pretty easy flower paintings on canvas. First create the darker base color, and then use lighter and lighter flower petals to add layers. You can use these technologies to paint your beautiful flower wall art canvas.
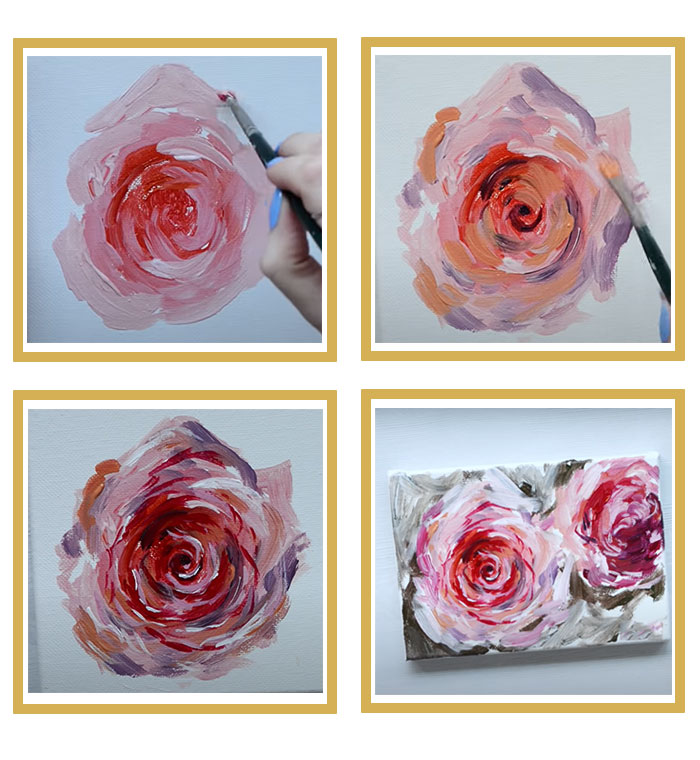
I want to show you how to paint a rose by three steps. Everyone can do this point. We are going to use three easy colors. The first step is the based gradient. This will be a beginning layer that we build on all the other layers so as to do this. I am gonna take some red and a bit of yellow to mix to keep it really warm. I will use it as the center of roses. So I am going to start from the center and build my way out with my brush. Just like the wall art flower strokes. I am just gonna go outwards to about the middle of the rose, and then I am going to take some red and add some white. These will be used in outer petals. Their colors are always a bit light. It is nice to overlap it and build up my way out until the edge of the flower rose. I have created petals using my brush almost like screw from the center. Now I want to add more white for a lighter tone, and again really build up those outer petals. I will enter again only for a bit of overlap. This is a place we want a different shape on the edge to build outer petals. Maybe we want a true circular. I really like its petals with a little bit of curl and create almost like jagged edges and that’s your base layer complete the next stage. We are going to add cool and warm tones to build depth. So adopt some red and add some blue. That will give us a nice cool purple shade. How do we start to add shade and you can see the cold tone on easy acrylic paintings of flowers on canvas. We do not want to end in deep purple unless it is you want. This is for creating shade, so we are going to add a bit of white in the same mixture, just like starting as before creating the outer flower petals.
I really like warmer painting. But this time I am gonna take some of the red and yellow again, adding some warmer shade. You can get it on an orange edge as you wish to paint it. I am going to choose a distinct color. It totally depends on your reference pictures. We are going to be adding dark and light details, so in this stage, we hope to tie all the lines together, to make it to life. So I will take the red straight from the tube onto a tiny brush and work from the middle. I am going to add in the petals and shades, bring in that depth of red color. So you maybe want to take a reference picture to build petals. Or you can work from the middle outwards and make up the petals as you go. The more you paint roses, the more confident you will get with them. Also, I am more confident to paint roses without referring to pictures. Because once you know the base anatomical structure of a rose 3d flower wall art, it is easy for our memory to build up. So I have worked from the middle all the time towards the edge to paint those petals and depth of dots. Those can attract your eyes. Now mark with dark red. I am gonna add a little bit of red and white to highlight the flower petals. You will get shade in between the petals. And then as a petal is coming out, you get the highlight where the light just hits it. So now I am gonna start to paint them in similar ways. Sometimes it is the best effect is those highlights close the shade, because their comparison between really popular. For the last part, I always like taking the white paint from the tube and then adding some small lightspot to lighten them. I think it is one part of my signature style, I suppose you would say and but for me it just feels unfinished until I have done this. I think it is because I like the art of exaggerating stuff very much, so I really like to exaggerate those highlights into bright white. So we started to easy paint pink rose paintings. Now it has been finished and accomplished as its building a flower painting easy. I just need to enter the same stage. The broadside background is like a rose, so I like to paint in very fluid. I would not add more details like I have the rose in the foreground because I hope it becomes the main focus. So this is going to be just more research in the background. I am gonna mix and keep the really fluid and create green. Apparently most people all know you are going to add blue and yellow together. But I am also adding a little bit of red to really tone down green, so it is not a vibrant yellow green. It can create more of a realistic green, in my opinion, and have a perfect match with roses. So I am going with the feeling of painting here. Now that lust flower has dried. I only need to add a bit of little details.
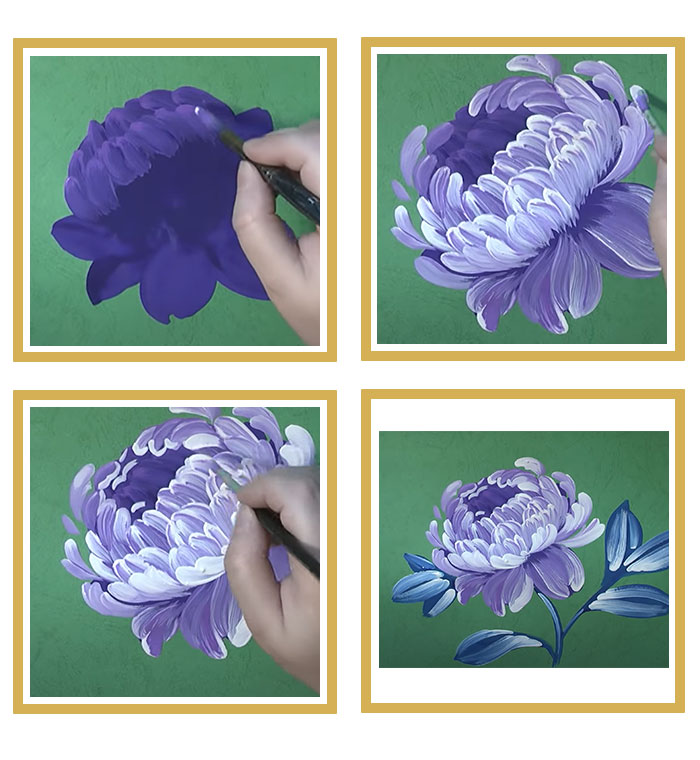
We will paint the peony with a round brush. I will paint with acrylic paint. We just need to add color to the palette. I am gonna add violet or dark purple onto the palette and add a bit of water to make it more fluid. I will use another color which is lighter purple. We do the same thing, add white acrylic paint to the palette, so let is start to paint. You need to draw a draft of flower wall art framed. Now we have gained the circle and are going to paint little flowers. The peony can be painted bigger with some vivid colors. I think we need it to be brighter. It is really cool. That is why I will paint with white. And then we are going to take a kind of new color, we will paint it. You are going to see the background. We are gonna this kind of light purple to load up all the paint brush. Now let’s take a little bit of white, they will paint with brush in here. You can make the petals paint with two brushes and a little contain the same strokes. You can make the petal paint two strokes and strokes inside one two and inside you see pie. I did not load up the light purple color if I took the white only. Now we can paint you blowing up all my brush with purple. I have got big pedals for our peony. I lit the white on the brush. Let’s paint, do not paint white acrylic here. I am going to hold on the handle of the brush and take a bit of white purple. But we need more white paint here to paint some petals. So we can paint flowers and leaves. Please paint a little bit more water, maybe the small leaves are smaller. Let’s wash the brush and take the small brush. I take the blue color again to fill it up all the brush with this blue color. and now we take a little bit of white paint the stroke in the center.
I am going to show you how to paint a easy big daisy simple flower wall art 3d. Now there are two kinds of acrylic colors on my palette. I am gonna load up my brush. And then I touch the corner and dove gray and get a tiny bit and then, I will put a dot to pull to all my strokes. You can make them with long daisy and short daisy petals. Now I am gonna start to paint the number of clock 12, 3, 9, 6. If you want your daisy to keep in a certain range, you can draw the outline of a circle, but I did not do that this time. Sometimes I seem to forget it. They have some strange things, but that also makes them funny. So how do I handle the petals? After double loaded them, I had the tiny bit of grey on there and on the surface, added little stripes. You do not want the petals to have a bit of grey because you do not want them to become dark. I am going to paint the petals according to clock 12, 3, 9, and 6, and then I am gonna come between and do the same thing. I will touch with brush down lean give it some pressure and then the spring back up and then I reload it. Sometimes I lead with white, sometimes I lead with grey. That depends on the effect which you hope for. To find out your favourite thing, but basically, I am setting my brush down on the chisel edge, putting some pressure and then I drag and lift back up to the chisel edge. That creates the petals. Now you can come in and add more petals. Or you could have left it alone. Now these could be a bit shorter, a little bit the same. However, you want it, but there you go there for the basic daisy. If you do not like the shorter petals, you can go around and re-do them. Do you hope they are the same with the original length of petals? Because you ran out of paint, just reloaded. And then you can take the daisy to the center. You can certainly use a brush and just kind of make a circle. I would use a little small brush to paint the tiny daisy. I always use several kinds of yellow. At first, I liked the yellow ochre. I do not have one on my palette here near my palette, but I will use it. It is called the appearance of golden ochre. In my opinion, it looks like a slight green compared with ordinary yellow ochre. Here are two ways to do this now. Just like what I said before. You can paint a circle, I am gonna load the yellow ochre or gold ochre onto my brush. And then only paint the center. Now you can see it is not too transparent, so you need to paint it again. You will see it only in a circle, then I will use a brighter yellow. Let’s grab one daffodil. You can use the yellow of sunflower, of course, you can use any other kind of one bright yellow. This is played folk art multi-surface, but you can also decorate an American ceramic coat. I just need a little bit of yellow, so I do not put it onto my palette, only highlight the length of top. If you get too much highlight and you do not like it, just go over it with golden ochre. If you are willing, it could also shadow along the base if you wanted, but I like the other way to paint the center. I am gonna go over top of this center to use a small paint brush. I just pounce it in the yellow ocher. And then I would just kind of pounce my center. Now I like the brush with its texture, it gives people a feeling of hairy, it has a bit of like the center of real daisy. Now I just tapped on some yellow ochre on the brush. So I am just going to kind of learn it to highlight that I did not mean yellow. See how I tap it on there to create the lightspot and that is your simple basic daisy that you paint with a flat brush.

We hope you will love the content of how to paint framed flower wall art in easy ways with 5 ideas easy for kids.

